Tables let you store and manage structured data directly in your workspace, organized into databases. Use them to maintain reference data, collect workflow outputs, or build lightweight data stores — all without leaving SteelEngine.
A database is the container that groups related Tables. A Table is the structured data store inside that database, with typed columns and rows. Open Databases from the workspace sidebar, then select a Table.
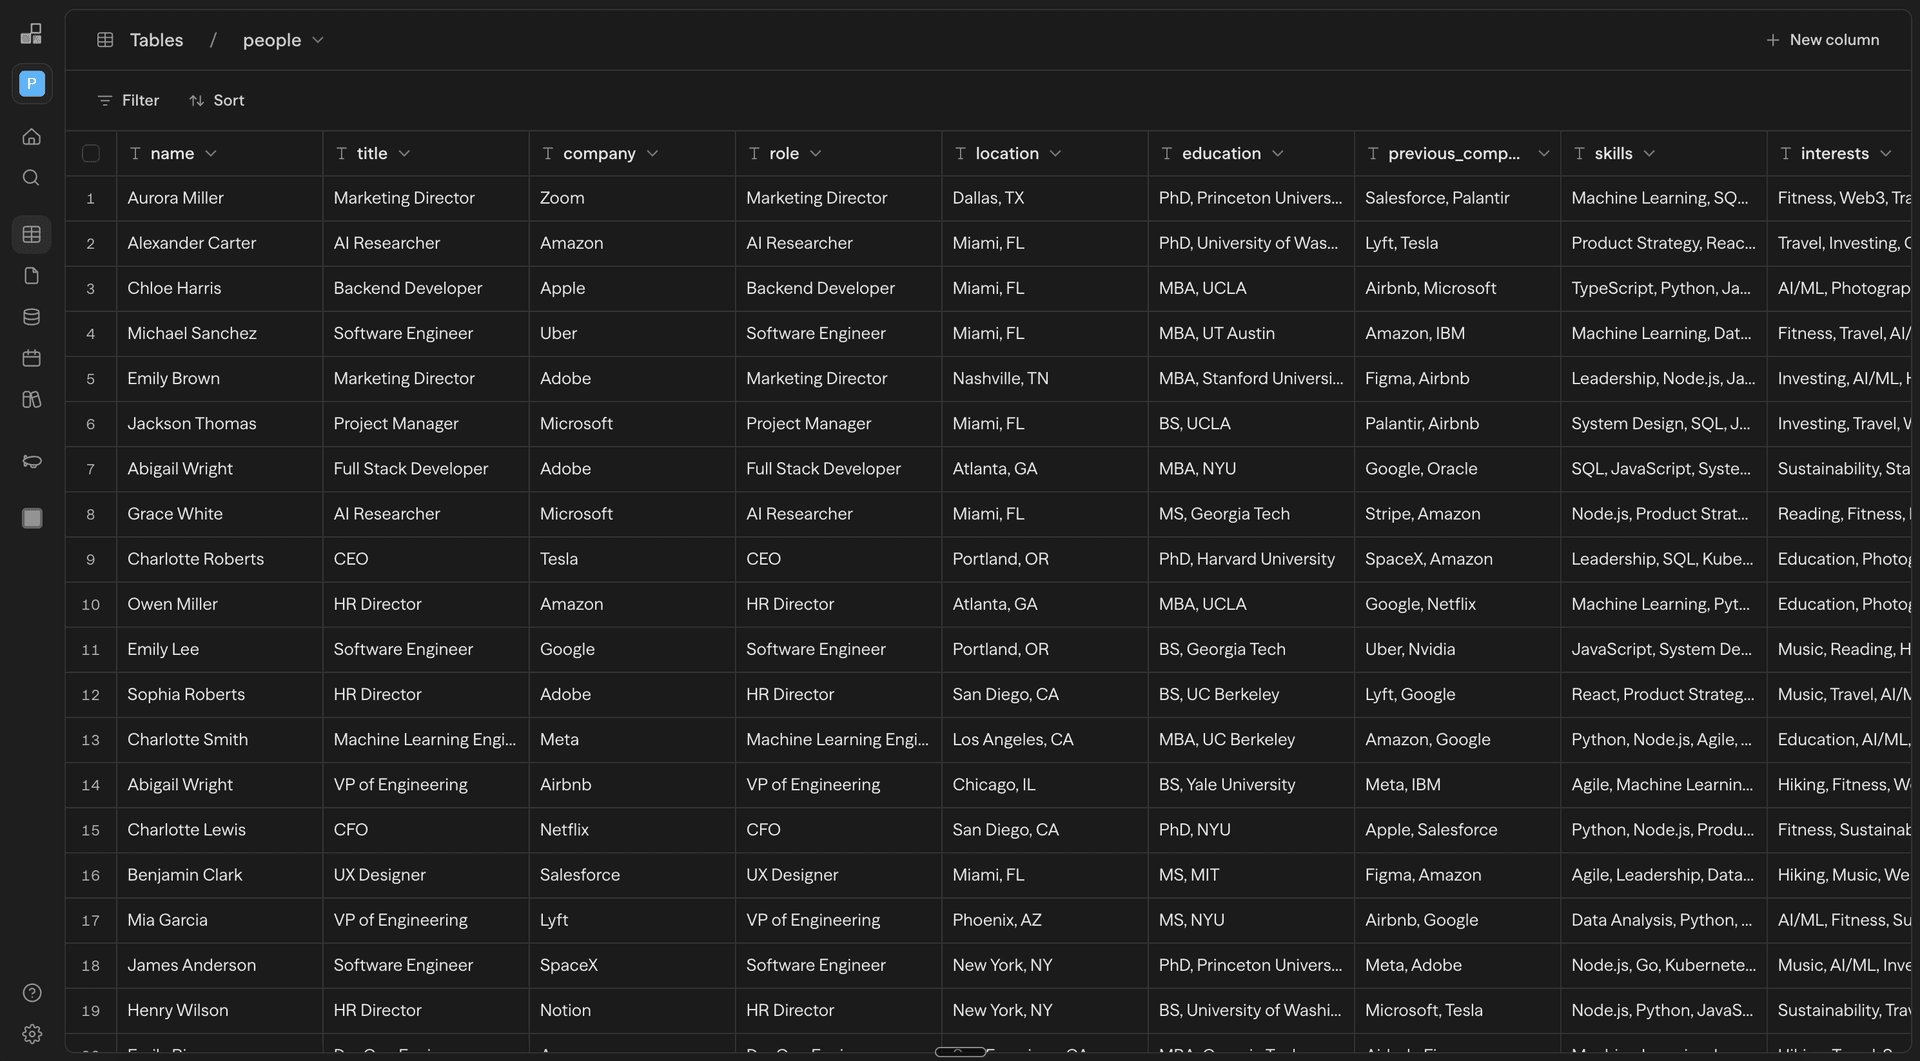
Each table has a schema of typed columns, supports filtering and sorting, and is fully accessible through the Tables API.
Creating a Table
- Open the Databases section from your workspace sidebar
- Open the database that should contain the table, or create one with New database
- Click New table
- Name your table and start adding columns
Table names must be unique within their database. Tables start with a single text column. Add more columns by clicking New column in the column header area.
Column Types
Each column has a type that determines how values are stored and validated.
| Type | Description | Example Values |
|---|---|---|
| Text | Free-form string | "Acme Corp", "hello@example.com" |
| Number | Numeric value | 42, 3.14, -100 |
| Boolean | True or false | true, false |
| Date | Date value | 2026-03-16 |
| JSON | Structured object or array | {"key": "value"}, [1, 2, 3] |
Column types are enforced on input. For example, typing into a Number column is restricted to digits, dots, and minus signs. Non-numeric values entered via paste are coerced to 0.
Working with Rows
Adding Rows
- Click New row below the last row to append a new row
- Press Shift + Enter while a cell is selected to insert a row below
- Paste tabular data (from a spreadsheet or TSV) to bulk-create rows
Editing Cells
Click a cell to select it, then press Enter, F2, or start typing to edit. Press Escape to cancel, or Tab to save and move to the next cell.
Selecting Rows
Click a row's checkbox to select it. Selecting additional checkboxes adds to the selection without clearing previous selections.
| Action | Behavior |
|---|---|
| Click checkbox | Toggle that row's selection |
| Shift + click checkbox | Select range from last clicked to current |
| Click header checkbox | Select all / deselect all |
| Shift + Space | Toggle row selection from keyboard |
Deleting Rows
Right-click a selected row (or group of selected rows) and choose Delete row from the context menu.
Import from CSV
Create a table from a spreadsheet export instead of building it by hand:
- Open the database that should contain the table
- Click Upload CSV in the header and choose one or more
.csvor.tsvfiles (up to 50 MB each)
Each file becomes a table named after the file. The header row becomes the columns. SteelEngine normalizes column names to letters, numbers, and underscores. It infers each column's type (Text, Number, Boolean, or Date) from the first 100 rows and falls back to Text. The new table gets the row cap of your plan. If the import fails, for example because the file has more rows than the cap allows, SteelEngine removes the partly created table.
Column names that collide after normalization receive numbered suffixes, ignoring case: Contact Name and Contact-Name become Contact_Name and Contact_Name_2. Uploads and imports through Chat use the same normalization and type inference.
Appending a File to an Existing Table
Chat and MCP can append a workspace file to an existing table using steelengine_tables.import_file. Supported files are CSV, TSV, and JSON arrays of objects. Values are converted to the existing column types; only matching columns are imported.
Imports recognize exact column names, current normalized names, and the trailing-underscore names created by older assistant imports. If those conventions would send values to different columns, the import stops with Ambiguous file column mapping before inserting rows. Rename the file's headers to the exact target table column names, then retry.
Relationships Between Tables
A relationship links a column in one table to a column in another table of the same workspace. A cell can then point at a row instead of repeating its data. Open a table and click Relations in the header to see its relations or create one.
- Pick the other table under Create a relation
- Choose the direction: Many-to-one (many records here share one record there) or One-to-many (one record here contains many records there)
- Map the two join columns. The column on the "many" side stores the reference. It must have the same type as the column it points at, and it cannot be the row ID
- Review the Sample matches preview and click Create relation
The relation column shows the matched row instead of a raw value. The table on the "one" side gains a read-only overlay column that lists the rows pointing at each of its rows. Creating a relation does not modify existing rows. SteelEngine blocks the deletion of a row while other rows still point at it. Deleting a table removes its relations.
Archiving and Restoring Tables
Table deletion and database deletion have separate rules. Tools can delete tables with the required permission and confirmation. Deleting the containing database requires an empty database and a signed-in dashboard action; see Deleting a Database.
Deleting a table (Delete in its context menu) archives it rather than removing it. Archived tables disappear from the database and from table lists. You can restore one from Settings → Recently Deleted under Tables. A restored table returns to its database, or to the Default database if its own was deleted. If another table has taken its name, SteelEngine adds a suffix to the restored name. The Database block's List Tables operation can include archived tables when you set Table Status to Archived or All.
Filtering and Sorting
Use the toolbar above the table to filter and sort your data.
- Filter: Set conditions on any column (e.g., "Name contains Acme"). Multiple filters are combined with AND logic.
- Sort: Order rows by any column, ascending or descending.
Filters and sorts are applied in real time and do not modify the underlying data.
Keyboard Shortcuts
All shortcuts work when the table is focused and no cell is being edited.
Mod refers to Cmd on macOS and Ctrl on Windows/Linux.
Navigation
| Shortcut | Action |
|---|---|
| Arrow keys | Move one cell |
Mod + Arrow keys | Jump to edge of table |
Tab / Shift + Tab | Move to next / previous cell |
Escape | Clear selection |
Selection
| Shortcut | Action |
|---|---|
Shift + Arrow keys | Extend selection by one cell |
Mod + Shift + Arrow keys | Extend selection to edge |
Mod + A | Select all rows |
Shift + Space | Toggle current row selection |
Editing
| Shortcut | Action |
|---|---|
Enter or F2 | Start editing selected cell |
Escape | Cancel editing |
| Type any character | Start editing with that character |
Shift + Enter | Insert new row below |
Space | Expand row details |
Clipboard
| Shortcut | Action |
|---|---|
Mod + C | Copy selected cells |
Mod + X | Cut selected cells |
Mod + V | Paste |
Delete / Backspace | Clear selected cells (all columns when using checkbox selection) |
History
| Shortcut | Action |
|---|---|
Mod + Z | Undo |
Mod + Shift + Z | Redo |
Mod + Y | Redo (alternative) |
Using Tables in Workflows
Tables can be read from and written to within your workflows using the Table block. Common patterns include:
- Lookup: Query a table for reference data (e.g., pricing rules, customer metadata)
- Write-back: Store workflow outputs in a table for later review or reporting
- Iteration: Process each row in a table as part of a batch workflow
API Access
Tables are fully accessible through the REST API. You can create, read, update, and delete both tables and rows programmatically.
See the Tables API Reference for endpoints, parameters, and examples.
Permissions
Table access follows catalog permissions. The seeded Viewer role grants table:read, table:query, and table:export. The seeded Editor role adds table:create, table:update, table:delete, table:manage_schema (adding, changing, and removing columns), and table:import (CSV import). Custom roles can grant any subset — see Roles and Permissions.
Limits
Limits are per workspace, set by the workspace's billing plan:
| Plan | Tables per workspace | Rows per table |
|---|---|---|
| Free | 3 | 100,000 |
| Pro | 25 | 100,000 |
| Team | 100 | 100,000 |
| Enterprise | 10,000 | 1,000,000 |
Self-hosted deployments with billing disabled give every workspace the Enterprise limits.
Additional structural limits apply regardless of plan:
- 50 databases per workspace
- 1,000 columns per table
- 100 KB per row
- 100 KB per text value (the row size is the binding limit)
- 1,000 rows per batch insert / bulk update / bulk delete
- 1,000 rows per query result (default 100)
Plan upgrades do not retroactively raise caps on existing tables. A table's max_rows cap is set when the table is created and persists for the lifetime of the table. If you upgrade your plan and need a previously-created table to use the new, higher cap, contact support to request a one-time backfill. New tables created after the upgrade automatically get the new cap.
Best Practices
- Use typed columns to enforce data integrity — prefer Number and Boolean over storing everything as Text
- Name columns descriptively so they are self-documenting when referenced in workflows
- Use JSON columns sparingly — they are flexible but harder to filter and sort against
- Leverage the API for bulk imports rather than manually entering large datasets